Categories
Visa FAQ

Guide To Visa Photo Size Requirements

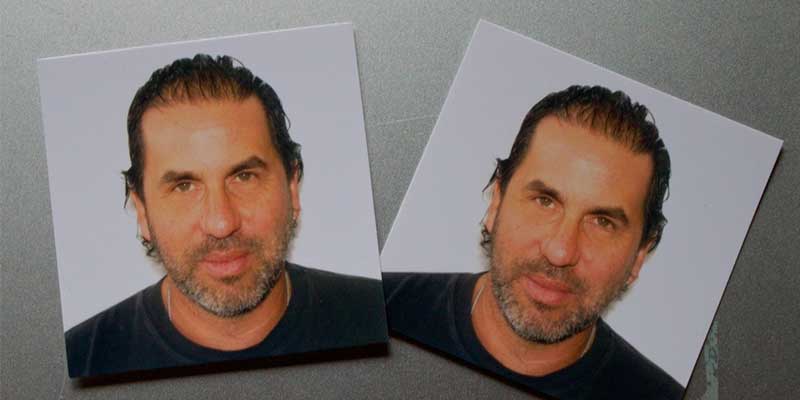
For your Indian passport to be considered valid, a passport size photo with specific dimensions and other necessary specs is mandatory. Further, if you wish to travel the world and explore its many wonders, your visa needs to have the prescribed visa photo size of the country you are travelling to. Some of the destinations you will travel to from India do not require a visa for entry or exit. In such cases, you will be relieved of the visa formalities. However, as many of the destinations do need a visa for Indian citizens, here is a guide to the photo specs for an Indian passport and the visa photo size requirements of some major travel destinations.

Popular Read: How to apply for Visa?

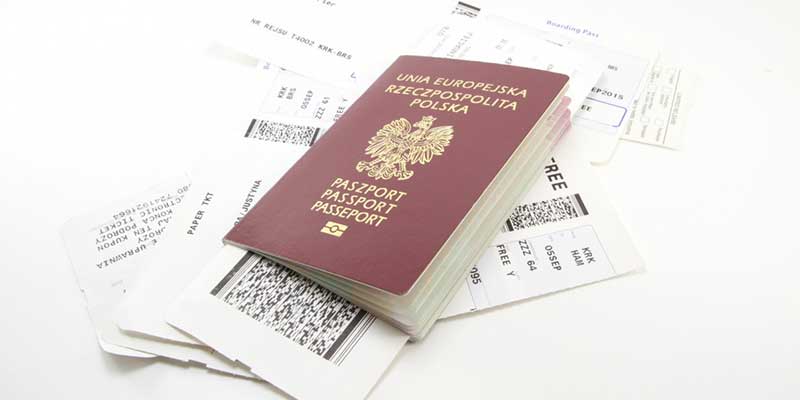
Indian Passport – Photo Specs 

  • Quantity needed for application – 2 
  • Size – 51mm x 51mm or 2 x 2 inches 
  • Colour – Natural colour for clear visibility of skin tone 
  • Head size and position – 35mm – 40mm; Centered position with eyes looking at the camera 
  • Recency – Taken within the last 6 months 
  • Background – Plain white 
  • Smile – None; Neutral expression 
  • Eyes – Open, towards the camera 
  • Spectacles – Prescription spectacles only 
  • Headgear – Religious purposes only with clear visibility of the face 
  • Dimensions and size (pixels) – 10KB – 300 KB and 350 x 350 px – 1000 x 1000 px 
  • Dress code – Casual or professional 
  • Beard – Optional

Read: Visa Interview – Questions, Answers, Tips

Guidelines to Indian Passport Photo

  • Each application must have 2 photos as per the specifications 
  • Filtered photos and photos older than 6 months will not be accepted. 
  • Ensure that your eyes are clearly visible, without sunglasses or tinted prescription glasses 
  • In case of thick lenses that obstruct the view of your eyes, remove them; any glare in the photo will not be accepted
  • No headwear except for religious purposes will be permitted; any shadows in the photo will entail rejection
  • Avoid red-eye
  • Keep your hair pulled back 
  • Clarity in lighting is key 
  • Dress appropriately 

Visa Photo Size for Europe / the Schengen Area, US, Thailand, Singapore, China, UK, and Dubai

Schengen Visa Photo Requirements 

The Schengen area is one of the most frequently visited areas by Indians. It is crucial to know the Schengen visa photo requirements as the Schengen visa grants you access to 26 countries that form the Schengen area. These include – Austria, Belgium, the Czech Republic, Denmark, Estonia, Finland, France, Germany, Greece, Hungary, Iceland, Italy, Latvia, Liechtenstein, Lithuania, Luxembourg, Malta, the Netherlands, Norway, Poland, Portugal, Slovakia, Slovenia, Spain, Sweden, and Switzerland. If you are travelling to Europe, the Schengen visa is the most commonly used one. Your search for the Europe visa photo size is right here!

Know in-depth: How to get your Schengen visa from India?

Here are some photo specs as per the rules of the Europe visa photo size / Schengen visa photo size – 

  • Quantity needed for visa application – 2
  • Size – 35mm x 45mm
  • Head size and position – 32mm – 36mm; Facing forward 
  • Recency – Taken within the last 6 months 
  • Background – Bright coloured; light grey preferred
  • Smile – None; neutral expression 
  • Eyes – Open, towards the camera
  • Spectacles – Prescription glasses only 
  • Headgear – For medical or religious purposes only 
  • Dimensions and size (pixels) – Not specified
  • Dress code – Avoid colours matching the background

Guidelines to Europe visa photo size / Schengen visa photo size – 

  • Head size should meet the mentioned requirements; this is measured from the chin to the top of your head
  • Blurred photos will not be accepted
  • If you usually have a bear, it is accepted; if not, avoid growing it out 
  • Any headwear or fancy jewellery worn not for medical or religious reasons will not be accepted; even for the accepted reasons, your face must be clearly visible
  • Sunglasses, tinted lenses, glare or thick-rimmed spectacles will not be accepted; eyes must be clearly visible 
  • Hair must be kept off the face 
  • Lighting must portray your natural skin tone; overexposed or underexposed photos and shadows in the photo must be avoided 
  • Background must be bright-coloured, preferably grey; white must be avoided 
  • Avoid smiling; have a relaxed look

Known: France Visa From India: Explained

US Visa Photo Requirements 

The United States of America is a popular destination for Indians to travel to, a study in, and work at. Indian citizens must obtain a US visa before travelling. To make the visa formalities details easier to understand, we have compiled a list of quick rules regarding the US visa photo size. The dimensions and specifications of the US photo size need to be clearly understood to avoid rejection of your visa application due to the photo given.

Know: Tourist Visa for USA from India

Here are some photo specs as per the rules of the US visa photo size – 

  • Quantity needed for visa application – 2
  • Size – 2 x 2 inches 
  • Colour – Visa photo to be in colour; not black and white 
  • Head size and position – Your head must be between the size of 1 and 1 3/8 inches from the chin to the top of your head 
  • Recency – Taken within the last 6 months 
  • Background – Plain, solid white or a shade of off white 
  • Smile – Neutral expression; a soft smile is accepted
  • Eyes – Open and clearly visible, towards the camera
  • Spectacles – None to be worn 
  • Headgear – Allowed for religious purposes only 
  • Dimensions and size (pixels) – 600 x 600 px – 1200 x 12000 px
  • Dress code – No uniform will be accepted; most other clothing is accepted 
  • Beard – If you usually have a beard, it is accepted; if not, avoid growing one for the photo

Also read: 10 Amazing Countries That Offer Visa On Arrival For Indians

Guidelines for US visa photo size – 

  • Ensure that the lighting is correct because both, overexposed and underexposed photos will not be accepted 
  • Your visa photo needs to be recent, and not older than 6 months before the time of visa application 
  • An easy way to know if your head position is correct is to ensure that your nose is the centre point of the photo
  • Use a solid white or off white background only; designs or coloured backgrounds are not permissible 
  • Avoid any work uniform; religious clothing is accepted
  • Any eyewear is not permitted
  • Wired or wireless headphones, Bluetooth, or other devices that are not regularly used hearing aids are not accepted 
  • The photos must be on glossy or matte paper 

If you are taking the photo yourself or scanning an existing one, the following rules need to be adhered to- 

  • No digital enhancing or alteration 
  • Use a plain background for the photo
  • Your face must cover about 55 % of the photo and must be positioned in the centre
  • Use correct pixel dimensions as mentioned above 

You can also use the government’s free tools to aid you in getting the correct photo for your visa application to the US. 

Thailand Visa Photo Requirements 

A much-visited tourist destination for Indians, Thailand is a spectacular place of visit. However, Indian citizens need to avail a visa on arrival if they are planning for a stay duration of no more than 15 days for tourism purposes. For a longer stay duration, you will need to apply for the regular visa. However, both, the visa on arrival and the regular visa have similar guidelines to be met with respect to the Thailand visa photo size. 

Read: Thailand Tourist Visa for Indians: Explained

Here are some photo specs as per the rules of the Thailand visa photo size – 

  • Quantity required for visa application – 2 
  • Size – 40mm x 60mm 
  • Colour – Photo must be in colour; black and white will not be accepted 
  • Head size and position – Head should occupy 70 – 80 % of the photo; centred and looking forward 
  • Recency – Taken within the last six months 
  • Background – Solid white colour only; no designs will be accepted 
  • Smile – Neutral expression must be maintained; teeth must not be visible 
  • Eyes – Open and clearly visible; toward the camera
  • Spectacles – Allowed if only the eyes are clearly visible 
  • Headgear – Accepted for religious or medical purposes only 
  • Dimensions and size (pixels) – 1200 dpi minimum 
  • Dress code – Avoid light-coloured clothing 
  • Beard – Not specified

Guidelines for Thailand visa photo size – 

  • The exact measurements of the visa photo size are non-negotiable 
  • Lighting must be correct in order to avoid overexposure or underexposure of the photo 
  • Smiling is not accepted for the visa photo; ensure to maintain a neutral expression 
  • Spectacles are accepted only if the frames are not thick, lenses do not have glare and are not tinted
  • Avoid red-eye 
  • Digital alterations will not be permitted 
  • No headwear except for religious and medical purposes will be allowed; in any case, your face and ears must be clearly visible  
  • No uniforms or light-coloured clothing must be worn 
  • Your head position needs to be squared off with the camera and your upper shoulders in view 
  • Ensure that there is no glare on the background caused due to a flash 

Singapore Visa Photo Requirements

One of the most commonly visited countries for tourism and work purposes, Singapore is frequented by many Indians. It is essential to know the details of the Singapore visa photo size before applying for the Singapore visa. 

Here are some photo specs as per the rule of the Singapore visa photo size – 

Also read: Covering Letter For Visa: What it is and how you can make one

  • Quantity needed for visa application – 2
  • Size – 35mm x 45mm
  • Colour – Natural skin tone needs to be visible 
  • Head size and position – 25mm x 35mm; centred and forward-looking 
  • Recency – Taken within the last 3 months
  • Background – Solid white 
  • Smile – Neutral expression 
  • Eyes – Open and clearly visible 
  • Spectacles – Prescription glasses only 
  • Headgear – For religious purposes only 
  • Dimensions and size (pixels) – Not bigger than 150KB and a camera of 2 megapixels or higher must be used 
  • Dress code – Not specified 

Guidelines for Singapore visa application – 

  • No kind of filtered photo is permitted
  • Any photo older than three months will not be accepted
  • Glasses are allowed only if you wear them on a daily basis; eyes should be clearly visible 
  • Headwear allowed only for religious purposes 
  • Hair can be let down as long as it does not cover your face 
  • Avoid wearing white clothes as they will not be in contrast to the background 
  • Photos must be printed on a good, semi-matte paper
  • Neutral expression to be maintained with a closed mouth
  • Lighting needs to be correct to avoid any shadows, overexposure, or underexposure
  • The camera is to be set 0.5 – 2 metres away from you

Know: What is a Sponsorship Letter for Visa?

China Visa Photo Requirements

China is a country visited by Indians for tourism and study purposes. It is essential to know the specifications of the China visa photo size. 

Here are some photo specs as per the rule of the China visa photo size –

  • Quantity for visa application – 2 
  • Size – 33mm x 48mm
  • Colour – Natural skin tone must be seen 
  • Head size and position – 15mm – 22mm; centred 
  • Recency – Taken within the last 6 months
  • Background – Solid plain white or light blue only 
  • Smile – Neutral expression 
  • Eyes – Open and clearly visible 
  • Ears – Clearly visible 
  • Spectacles – Thin rimmed eyewear only
  • Headgear – For religious purposes only
  • Dimensions and size (pixels) – Not specified 
  • Dress code – Clothing to not be the same colour as the background 
  • Beard – Optional

Write your own Self-introduction letter!

Guidelines for China visa photo size – 

  • Beards accepted if it reflects the everyday look 
  • Headwear worn for religious purposes must not block the face
  • Portraits or side shots are not permitted
  • A 3mm – 5mm of plain white space between the top of your head and the top of the photo must be maintained 
  • Lighting must be evenly distributed 

UK Visa Photo Requirements

A very popular destination for studying and work, the United Kingdom attracts many Indians. 

Here are some photo specs as per the rules of the UK visa photo size – 

  • Quantity needed for visa application – 2
  • Size – 45mm x 35mm 
  • Colour – Only colour photos are accepted
  • Head size and position – 29mm – 34mm; squared with upper shoulders visible
  • Recency – Taken in the last 30 days 
  • Background – Cream or light grey 
  • Smile – Neutral expression 
  • Eyes – Open and visible
  • Spectacles – Only if prescribed 
  • Headgear – For religious and medical purposes only
  • Dimensions and size (pixels) – Not specified 
  • Dress code – Not specified
  • Beard – Optional

Guidelines for UK visa photo size – 

  • The size 45mm x 35mm cannot be from a larger photo 
  • True colours with no digital enhancements will be accepted 
  • If you are on a wheelchair, it must be covered with a sheet so that it is not visible 
  • Ensure to maintain a neutral expression with your mouth closed 
  • Prescription glasses are allowed only if eyes are clearly visible 
  • Headwear worn for religious or medical purposes must not cover the face 
  • Letting your hair down is allowed as long as your face is clearly visible

Dubai Visa Photo Requirements

A country often visited by Indians for tourism, study, and work purposes, Dubai offers several growth opportunities. 

Here are some photo specs as per the rules of the Dubai visa photo size –

  • Quantity needed for visa application – 2
  • Size – 43mm x 55mm 
  • Colour – Only colour photos are accepted
  • Head size and position – Head should occupy 60 – 70% of the photo area; centred
  • Recency – Taken within the last 6 months 
  • Background – Plain white or off white
  • Smile – Neutral expression 
  • Eyes – Open and visible
  • Spectacles – None to be worn 
  • Headgear – For religious purposes only
  • Dimensions and size (pixels) – Not specified 
  • Dress code – Not specified
  • Beard – Optional   

Guidelines for Dubai visa photo size – 

  • The size 43mm x 55mm cannot be from a larger photo 
  • True colours with no digital enhancements will be accepted 
  • Ensure to maintain a neutral expression with your mouth closed 
  • No spectacles are allowed
  • Headwear worn for religious purposes must not cover the face 
  • Letting your hair down is allowed as long as your face is clearly visible

Ensure to check these lists before you head to your desired travel destination!

Further read: New Zealand Tourist Visa for Indians: Explained

Categories
Visa Free Countries

Thailand Tourist Visa for Indians: Explained

Thailand is known for its easy-going tourist visa policy for Indian citizens. The policies applicable to the Thailand visa for Indians are quite lenient, and you can apply for a Thailand visa on arrival for Indians. These visas are suitable for those who intend to visit Thailand for a short vacation of 10-15 days. It is easy to attain and serves as a convenient Thailand visa for Indians. This visa is not the only one, but fear not, we have got you covered on any possible questions you may have about the Thai visa application procedures and what-not. It sounds like a Herculean task, but in reality, it is a minor part of a larger vacation or trip.

Read: 10 Amazing Countries That Offer Visa On Arrival For Indians

Validity and Issuing the Thailand Visa

The visa is valid for 15 days or two weeks and will be provided as soon as you enter any of the following checkpoints:

  • Suvarnabhumi Airport, Bangkok.
  • Don Mueang Airport, Bangkok
  • Chiangmai International Airport, Chiang Mai
  • Phuket International Airport, Phuket
  • Hatyai International Airport, Songkhla
  • U Tapao Airport, Rayong (Pattaya)
  • Samui Airport, Surat Thani (Koh Samui)
  • Sukhothai International Airport, Tak Immigration Checkpoint (Sukhothai)
  • Chiangrai Airport, Chiang Rai
  • Surat Thani Airport, Surat Thani (Koh Samui, Koh Phangan)
  • Hua Hin Airport, Hua Hin
  • Trang Airport, Trang (Koh Chang)
  • Krabi International Airport, Krabi


DID YOU KNOW?

While these checkpoints can be visited for air arrival, there are other checkpoints. Indian citizens entering from Laos, Cambodia, Myanmar and Malaysia will receive a Bangkok visa for Indians on arrival at land checkpoints. So, there are many ways for an Indian citizen to access the on-arrival visas. It is to be noted that each checkpoint follows a set of customs. Therefore, be sure to read up on the location you will be collecting your visa from. It helps to go in prepared for the worst.


Thailand Visa Requirements

  • The Thailand tourist visa requirements are as follows:
  • Indian Citizen Passport is valid for a minimum time frame of 30 days or a month. It will be necessary for you to fly in and fly out.
  • Air tickets for both trips in and for flying out of Thailand within the next 15 days. Of course, these will serve as evidence for your eligibility for the visa’s time restraint.
  • One passport-sized (4 x 6 cm) photo.
  • The filled visa application form and the Thailand Arrival Card, which you will be provided with on the flight are absolute necessities.
  • The address of the hotel you are staying in Thailand and confirmation for the booking. There are many good sites for you to book your hotel on. 
  • Evidence that your funds sum up to a minimum of 10,000 THB per person and 20,000 THB per family throughout your stay in Thailand. While it is a rare occurrence to ask for funds, you should be able to provide it. All currencies are accepted as long as the conversion is correct and shows that your trip will be sustained by your earnings.

Must Read: Visa Interview – Questions, Answers, Tips

These are requirements which must be met for the approval of the Thailand visa for Indians. So, you must be conscious of carrying these documents with you after applying for the Thailand Visa on Arrival for Indians. Just like tickets for a film, they guarantee you access to a country filled with summer wonders.

Thailand Visa Free For Indians: Cost Of The Visa

A recently passed waiver on the fees has attracted and brought about a flurry of Indian tourists to all parts of Thailand. The waiver reduces the price to – literally speaking – nothing. The Thailand visa cost has been made 0 THB until April 2020. Tourists all over India are naturally rushing to visit Thailand for this reason, of course, paired with the blue waters and sunny beaches.

However, if you visit outside this period, the visa will cost you 2000 THB. This is only accepted in Thai baht; the local currency. So, do carry this amount in cash if you are visiting after the mentioned duration of time. They will not accept any other modes of payment.
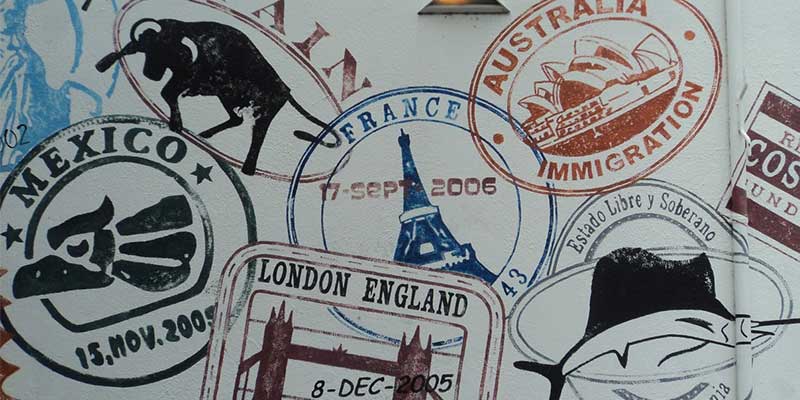
E-Visa and Others

If you are looking at extending the limit of 15 days for your stay in Thailand, you will be required to apply for the visa available online. You can apply for an Electronic Visa on Arrival of course, but due to the chances of glitching it is safer to go with the physical copy.

A Thai Single Entry Visa will benefit those who intend to spend more time in Thailand. It can be applied for at the Thai Embassy in New Delhi. This Thai Visa for Indians permits for a longer stay in Thailand. Indian citizens applying here or at the Consulate in Mumbai are expected to deal with a Thai Visa cost of 2500 INR.

Know in-depth: Covering Letter For Visa: What it is and how you can make one

Visibly, there are various methods to apply for a visa which permits you to extend your stay beyond 15 days. While these are comparatively expensive, they do allow for more time. They are also in your hand when you land in Thailand so the customs are shorter.

As you can see, the Thai visa for Indians is not too difficult to acquire. Depending on your purpose, there are many forms of visas for which an Indian must apply. While it sounds like a challenging to apply for it and then wait for it, there is very little to it. You just need to apply for it online and receive it at the airport instead of your home address. Which is, far more practical for you. You do not need to worry about losing it on the way. Instead, you just get on the plane, collect the card, get down after a relaxing flight and get your visa.

Also Read: What is a Sponsorship Letter for Visa?

Conclusion

To conclude this, we all now know that it is compulsory for Indians to attain a Thailand visa for Indians. There is a visa on arrival option which is currently free but is affordable nevertheless. This visa can be collected from a number of checkpoints and is valid for 15 days. Those seeking for a longer stay can apply for a pre-made Visa at the Consulate in Mumbai or the Embassy in Delhi for a moderately higher price. See? It is not as complicated as you would have thought it was when you started planning for your trip. Now that you know more about the technicalities of it do not hold back. Book those tickets and apply ASAP because who doesn’t like spending their vacation on a good old beach?

Categories
Document types

What is a Sponsorship Letter for Visa?

Without any doubt, getting your visa feels very liberating. You are now free to enter a new country or group of countries as you find suitable. However, getting this visa is not as simple. A tedious procedure is associated with the receiving of a visa, and if this is your first time applying, you need to understand, it is essential. Now, this process involves several documents, each playing a vital role in your application process. A sponsorship letter for visa is one of these documents. Your sponsorship letter for visa is a necessity as it helps you explain how your trip is being funded.

Read: How to apply for Visa? In focus – Schengen visa, H1B visa

What is a Sponsorship letter?

So, let’s start with what a sponsorship letter for visa is. A sponsorship letter for visa is a document wherein, your sponsor justifies their relation to you. Say, you are applying for a sponsorship letter for tourist visa, your family will probably fund the trip. Therefore, the Embassy would require a sponsorship letter from father or mother. Even if you are travelling for business purposes, you will be required to provide a sponsorship letter for visa from company. This serves as evidence for you to be able to sustain your trip and stay anywhere.

How do we write one?

Now, the natural question to ask next is for an example. A common visa applied for is the Schengen visa. This too requires a Schengen visa sponsorship letter. What is important to note is the format. This applies regardless of whether you are writing a Schengen visa sponsorship letter, a sponsorship letter for tourist visa or a sponsorship letter for visa from company. A sponsorship letter for visa follows a standard format which we have displayed below in a sample. The format and content contribute to whether your visa application is accepted or rejected.

Also Read: How to get your Schengen visa from India?

Tips to write a good Sponsorship Letter

  • Ensure that you use formal language. Start with the salutation, ‘Dear Sir/Madam’. This will give the consular the impression that the sponsor is aware of what they are doing. This should be followed with details about the sponsor; where they stay, where they work and what post they hold, the cause for the letter and of course the relation they have.
  • Keep it short and simple. Do not write too much because quantity does not equal quality. In fact, excessive content stands a chance to frustrate the consular. The more relevant your content is, the more likely it is to be accepted immediately.
  • Any emotional content or matter which is too personal will be seen as unnecessary. The consular has no desire to know where you are going to eat breakfast or how much you will spend on clothing. Nor are they interested in knowing how much your sponsor cares for you. Really, they need evidence of whether your sponsor will be able to support you financially.

Know in depthSelf Introduction letter for Visa: All you need to know

  • Try to see that the information you are mention in writing is backed by documents you can submit. Evidence is a must to submit. It creates less room for questions and speeds the process up.
  • Do not forget to add your contact details outside your address. In case of any confusion, the Embassy can contact you, making the process as a whole faster.

Finally, your sponsorship letter for visa should clearly state the details of travel; including the dates, and a brief itinerary (if you are travelling with them. This makes the sponsors financial position transparent and guarantees that they will be able to fund the trip; journey and stay included.

Remember to add the date the letter was written and include a line about the documents which you have attached.

Sample Sponsorship letter for visa


Date:

Immigration Officer

[Embassy Name]

[Embassy Address]

[Embassy Phone Number]

Sponsorship Letter for [Applicant’s Name] with Passport No. *************


Dear Sir/Madam,

I, (Sponsor’s Full Name) currently residing at (Sponsor’s Home Address]), and a citizen of (Country’s Name), am writing this letter in support of the visa application of my (parent/sibling/friend/other), (Applicant’s Name).

The purpose of the visit of my (parent/sibling/friend/other), (Applicant’s Name) in the country of (Name of Country) is to [give the reason behind the trip]. He/she will be here from (Mention starting date of visit in format DD/MM/YY) to (Provide ending date of visit in DD/MM/YY).

During the specified trip dates above, (we/he/she) will be visiting (Specify city/place names). In addition, (Applicant’s Name) will be staying at (Sponsor’s Address or Hotel Address). I will be covering all of the expenses of the trip, through (Mention means of funding).

Attached to this letter, please find all of the required documents to support the given statements.


Best Regards,

[Sponsor’s name]

[Sponsor’s home address]

[Sponsor’s phone number]

[Sponsor’s occupation]

[Sponsor’s signature]


Documents to be submitted with the letter

  • Your sponsorship letter for visa needs to be submitted with a few other files and things. These will support your sponsorship letter for visa and act as proof for what you have written. The needed documents are:
  • A scanned copy of your ID / passport
  • Proof of financial funds for instance, bank statements, a work contract and the last three payslips
  • Proof of home/rental contract that provides the address of the sponsor
  • A Travel Itinerary of the places planned to visit together (if applicable) or alone. This clears out the question of how much you intend to spend at the place of stay, especially concerning travel and stay. Additional charges do not concern anyone as much.
  • If the sponsor is taking days off for the trip, submitting a document from the workplace along with the application, serves as a bonus!

Suggested Read: Visa Interview – Questions, Answers, Tips

Be sure that each document is up to date and attached carefully. The loss of even one document can cause the rejection of the application. It also helps to have evidence as the consular will not be as confused and can move faster.

Submission – Where and When

Once the sponsorship letter for visa is written and the required additional documents are attached, you submit the letter. The question you would naturally have is, when and where? The answer is quite simple. After signing the letter, the letter is put along with the rest of the documents required for application and submitted at the Embassy. This is done on the day of the visa appointment, following which each document will go through the required checks. There is little you can do in this period but wait. As long as you have followed through with the instructions you will not face any difficulty.

Also read: Tourist Visa for USA from India

Conclusion

The sponsorship letter for visa sounds complicated, but it really is not. It is a simple document you do not need to stress for. It is written like any formal letter and does not need too much effort. Collecting the required additional documents can be quite the hassle, but it really helps the application. Additionally, it increases the sponsors credibility be it a sponsorship letter from father, your boss or close friend. It is a formality you undergo to travel. And, when you finally hold that visa in your hand, does it not fee worth it?

So do not let the details get to you. It is as simple as writing a letter of leave to your school principal or boss. It seems nerve-wracking but all it requires is proper grammar, the ability to be formal and write an impersonal letter. Of course, the relationship with the sponsor should be in alignment with the reason for travel, but the consular is not as bothered by these personal details. A well defined financial statement with a clearly defined travel plan helps you express yourself to the consular well enough that your sponsorship letter for visa clears the path for the rest of the documents involved in the application. So, do not worry and plan an enjoyable trip!

Further Read: Covering Letter For Visa: What it is and how you can make one

Categories
Visa FAQ

Visa Interview – Questions, Answers, Tips

Visa is an official document required to enter and exit the country. When you apply for a visa, visa interview play a key role in determining whether you’re granted a visa or not.

Visa Interview is a scheduled meeting between the applicant and the official of the respective country. The official determines your eligibility for granting visa by asking detail-oriented and specific questions to understand your purpose of visit.

Through the intensive interview, process officials want to ensure that you’ll return home in the expected time and will not be part of any illegal activities during your visit. The questions may vary from basic to slightly personal. An ideal candidate would be someone who answers them without hesitation and with ease and accuracy.

Read: How to apply for Visa? In focus – Schengen visa, H1B visa

Common Visa Interview Questions

Now there can be a variety of questions that might be asked depending from person to person. But here is a list of questions that would help you prepare for your work, study, tourist or visitor visa interview. 

This list covers the majority of questions that might be asked in a visa interview . Keep in mind that not all the questions would be asked to the same individual.

1. What is the purpose of your visit?

In reply to this question, tell why you are travelling to the destination country whether it’s for work, family visit, study or vacation.

2. Who is sponsoring your trip?

Mention the name of person/agency sponsoring your trip. If it’s a self-sponsored trip, make sure you have the bank statements to show sufficient funds. 

3. Are you Married? If so, how long have you been married? What does your spouse do?

If you’re not married state that you’re single/divorced. Else mention the name of spouse and exact marriage date.

4. Do you have children? What do they do?

Mention the number of kids you have and their names. If they’re studying in school, provide complete information. If your children are working, mention their respective companies and job titles. 

Sometimes it’s difficult to recall the details; hence, you should be prepared in advance for such questions.

Know In-Depth: Covering Letter For Visa: What it is and how you can make one  

5. Do you know the Annual income of your Son/Daughter?

Prepare in advance for such questions and give the annual income details to the official.

6.  Are you travelling with someone?

Answer in yes or no, If you’re traveling with someone clarify your relationship with that person.

7. Why are you traveling alone?

If the answer to your previous question is no, then they may ask your reason to travel alone.

Also Read: Self Introduction letter for Visa: All you need to know

8. Do you have health insurance to cover this journey?

Show the documents to provide proof of health insurance for the journey.

9. Do you pay Income tax? When was the last time you paid tax?

This is asked to check your financial status and honesty. Answer this accordingly with income tax statement proof.

10. Is this your first time in the country?

Answer yes or no. 

11. Have you traveled to other countries?

Answer with a yes or no. If you have traveled to other countries, tell them the name of the countries you have been to.

12. How do we know you’ll return back within said time?

The officials just want to see whether you have plans to come back or not . Give them a detail of your work commitments and family responsibilities back home. You can mention your ongoing job, business or property etc.

13. Do you have a Job Leave Approval letter from the employer?

If you’re a working professional, make sure you have a leave approval letter from HR. Share it with the official when asked. 

14. Where do you stay in the residing country?

Give your complete home address in the country.

15. What would you do if your visa gets rejected?

Tell them that you have commitments in the home country and you’ll go back to that. Mention your job and family which you would attend if visa gets rejected.

Popular Read: 10 Amazing Countries That Offer Visa On Arrival For Indians

16. Why should we grant you a visa?

This is an important one. If you’re traveling to the country, mention how you are interested in their culture and what their country has to offer in terms of tourism. If you’re going for work or study, you can share how the visit would help you professionally with your career, why you have chosen their country for work or study. 

Visa Interview Tips 

Visa Interviews are an important step in acquiring your visa for the destination country. In 2018, 9.6% of the total visa application for Schengen area were rejected. Which makes it necessary to be well prepared before appearing for a visa interview. Here are a few visa interview tips that would help you clear the interview process. 

  1. Ensure to be on scheduled date and time to the embassy/consulate of the country.
  2. Have a checklist of required documents and keep them handy before going for the interview.
  3. Explain strong ties to your home country and why you would come back to your home after the agreed date.
  4. The interview would be conducted in English and not your native language, so make sure you practice with someone beforehand.
  5. Be clear and concise about your purpose of visit and plans in the country. If you have relatives in the destination country, keep their information handy.
  6. If you have dependents at home or property, explain who will take care of them while you are gone. 
  7. Answer all the questions with confidence. Do not hesitate as that would be taken as a sign of hiding information.
  8. Dress up appropriately and smile. 
  9. Do not argue or ask irrelevant questions to the official.
  10. Verify the name, date, address etc. on your documents matches with the details on your passport.

H1B Visa Interview

The H1B visa allows employers in the US to hire foreign workers temporarily for speciality jobs. It’s issued for 3 years which can be extended up to a maximum of 6 years. It’s essential for an individual to have a Bachelor’s degree or equivalent to be eligible for that job. There is a yearly cap of 65000 on H1B visas hence the visas are allocated based on a lottery system. An additional cap of 20,000 visas for those who completed their masters from a US university. You can read all about the lottery process here.

H1B Visa Interview Process

Book an Appointment online to your nearest consulate according to your convenience. Make sure you have all the necessary documents. 

  • Arrive for Interview – Arrive 10-15 mins early at the consulate. Keep your original passport, appointment letter and visa application fee receipt ready to show to officials if asked.
  • Security check – Security check will be done upon entrance.
  • Fingerprint scan – Post security check you’ll be given a token determining your interview number. You’ll be taken for fingerprint scanning where the scans will be matched with the prints taken at Visa Application center.
  • Wait for your call – Wait patiently and move to the assigned window when your name is called. Smile and be seated, follow the instructions given by official.
  • Interview process – Be ready with all the documents and answer the questions in a clear and concise manner. You’ll immediately get to know if your visa gets approved and passport will be delivered to you in 3-4 days.
  • Visa Denied – In case of rejection, you’ll be handed over your passport immediately.

H1B Visa Interview questions 

Some of the questions which were not covered as part of basic interview questions. These might specifically be asked to H1B visa applicants.

  • What would be your role in the company you’ll be working for in the US?
  • Which company do you currently work for?
  • How long have you been working here?
  • Please show us your experience letter?
  • What is your role in the current company?
  • How will you survive for the first month before getting your paycheck?

Related: Tourist Visa for USA from India

  • Questions regarding your sponsoring companies interview process, annual turnover, no of employees, salary, clients, CEO, projects, technologies etc.
  • Questions regarding your education like educational qualifications, projects, technologies and software you are aware of, certifications, university name, research process, internships, prior work experience etc.

B1 visa Interview

B1 visa is a non-immigrant US visa granted to individuals for business purposes. It allows the visa holder to negotiate contracts, settle estates, consult with US business associates and attend conferences and business events.

The B1 visa holder can visit the US as many times required and hold business relations with the US.

B1 Visa Interview Process

Eligibility

Check your eligibility for the visa. An individual should have business intent, sufficient finances to cover their stay and should intend to home country after work is done.

Form DS-160

Fill up the form with all the relevant information. Find the section for B1 visa and fill the form. Submit it online, and you’ll get the confirmation page and number which is required later during the interview process.

Visa Fee

The application fee for the B1 visa is $160. Along with the application fee, you might also have to pay the Visa Issuance fee, which depends on your home country.

  • B1 visa documents file
  1. DS-160 Form confirmation page and code.
  2. Passport with 6 months validity beyond your stay in the US.
  3. Photo
  4. Interview confirmation page
  5. Bank statements.
  6. Letter with the purpose of the trip.
  7. Letter from Employer and payslips from last three months.
  8. If you have visited the US before bring documents supporting that.
  9. Ties to home country such as job, property, business etc.
  10. Letter from Authorities stating you do not have any criminal records.

Interview

On the interview, date be present on time with all the required documents. Be prepared to answer all the questions and present relevant documents when asked. 

B1 Visa Interview Questions

Here are some B1 visa specific questions that might be asked during your visa interview.

  • What is the name of your company?
  • How many employees are travelling with you?
  • Are there any specific dates for your conference or business meetings?
  • Can you show your business/visiting card?
  • What is your annual income?
  • Do you have a credit card?
  • Who will look after your business in your absence?
  • Are you planning to work in the US?
  • Are you planning to extend your stay?

Schengen Visa Interview

To stay or transit through member countries of the Schengen Agreement, one must apply for a Schengen visa. It allows access to 26 member countries. Schengen zone is defined by the Schengen Agreement that allows free and unrestricted movement of goods, services and people among these countries.

Read: How to get your Schengen visa from India?

Schengen Visa Interview Process

  • Type of Schengen visaFigure out the type of visa you want to apply for e.g. Transit, tourist, Business, Study etc
  • Where to ApplyApply in the consulate of the country you’ll spend maximum time in or the country from where you are starting your trip.
  • AppointmentBook an appointment based on your convenience.
  • Visa Application Form (Download the form here.)
  • Required DocumentsEnsure you have all the documents before appearing for the interview.
  • InterviewAttend the interview and answer questions with honesty and confidence.
  • Visa FeeSchengen visa fee is €60 per person. To get a list of Schengen visa fee for kids and special categories, check here.
  • Wait for the Visa status – The approval period may take 15-30 days. So be patient and wait for your Visa status.

Schengen Visa Interview Questions

List of questions that would help you in clearing your interview.

  • Which countries do you intend to visit and why?
  • Have you visited Schengen countries before?
  • Are you aware of what countries your visa covers?
  • Will you study in a Schengen country?
  • Stay and flight details.

FAQs for Visa Interview process

1. How Long does a visa interview take?

Although the interview process doesn’t last for more than 5 minutes, the entire process takes 2-3 hours in completion.

2. What should I bring to my visa interview? 

Keep a checklist ready to ensure you have all the required documents. Bring your original passport and visa fee receipt along with the Visa Interview appointment Letter.

3. How can I pass my visa interview?

Stay relaxed and answer all questions honestly. Keep all the documents handy and provide proof wherever required.

4. How should I dress for a visa interview?

“First Impression is the Last Impression”. Make sure you look presentable at the interview. Wear smart formals like Blazer, trousers, salwar suit, business suit etc.

Further Read: Australian Visa For Indians: A complete guide

Categories
Countries

Tourist Visa for USA from India

Are you planning for a vacation in USA? Are you wondering how to process your tourist visa for USA from India? The article will substantiate you with all the information and pre-requisites for tourist visa processing.

What can you do with a tourist visa for USA?

The Tourist visa for USA from India permits you to perform the following activities:

  1. A holiday for visiting tourist destinations in the USA 
  2. Visiting relatives or family members and even friends
  3. Any treatment for medical ailments
  4. Engage as a participant in any events related to sports, music or any kind of social gatherings and even voluntary contests
  5. Attend any course related to any recreations which do not demand any credit for achieving the relevant credentials

Popular Read: 10 Amazing Countries That Offer Visa On Arrival For Indians

Where can you apply for a tourist visa for USA from India?

The tourist visa for the USA mandates it to be applied at the designated US consulates and embassy in India. In India, the US embassy is located in Delhi and the other consulates are located in Chennai, Hyderabad, Kolkata, and Mumbai.

The details of each of them along with their addresses, directions and phone numbers are available on the US embassy website.

What are the documents required for applying for a tourist visa for USA from India?

Before applying for an appointment with the US embassy or the US consulates, it is important to fill up the online DS-160 visa application form. The documents required for US tourist visa and to complete the application form are mentioned below:

  1. Passport with validity for the next six months from the date of application of the visa
  2. Details of previous visits to the USA (maximum five) and any other international travels undergone during the last five years. You must have the dates, countries, and purpose of the visit recorded in the application form
  3. Educational qualifications with details of the pass out years and the attained degrees
  4. Information about the current and previous work experiences and details
  5. Itinerary for the travel, if available. It is better to have the address, phone numbers, duration of the stay and return tickets available for a smooth hassle-free application

Know in-depth: Covering Letter For Visa: What it is and how you can make one

What are the photograph specifications for applying a tourist visa for USA from India?

The photograph for the DS-160 application must meet the specified criteria as mentioned by the US Department of State. The Department has strict guidelines on the specifications needed for US tourist visa requirements, as mentioned below:

  1. The photograph should not be more than six months older from the date of US tourist visa application from India
  2. The applicant must not be wearing any glasses which is a strict mandate for US tourist visa requirements starting November 1, 2016
  3. The face must be towards the camera with no tilting of the head and with normal expression. There must be no shadow obstructing the visibility of the face
  4. The eyes of the application must not be covered or closed
  5. There must not be any headgear or hat covering the head or the hair unless mandated for any religious needs 
  6. The photograph must be coloured in an off-white or simple white background
  7. The size of the photograph should be 51 X 51 millimetres, with the head centred. The size of the head must be between 25 and 35 millimetre

Also Read: How to apply for Visa? In focus – Schengen visa, H1B visa

The photographs must not be a scanned image from any other personal or official documents of the applicant. The photos must not be clicked from a mobile phone and must not be full length. The detailed photography guidelines for US tourist visa applications from India are mentioned here.

What are the steps to complete DS-160 online application form for the tourist visa for USA from India?

The application needs to be vigilant while filling up the DS-160 application form required for US visa documents. He/she should be attentive to the documents required for a US tourist visa. The detailed guidelines on the procedures for filling up the DS-160 form are mentioned here.

TheFind the visa application form here .

The steps for completing and submitting the electronic form are mentioned as follows:

Step 1: Select a location from where you are applying the tourist visa for USA from India. Enter the captcha code and then proceed to the next page

The available options for the locations are

  • Delhi
  • Chennai
  • Hyderabad
  • Kolkata
  • Mumbai

Step 2: Creation of the Application id and selecting the security question and answer

The application id is generated automatically. You need to select a security question and answer for retrieving the application once saved in the system. Click on Continue when done.

Step 3: Fill up personal, travel, work, family and educational information for US visa documents 

1 .Personal Information – It has two parts Personal 1 and Personal 2. 

    • In Personal 1, enter given the name, surname, marital status, date, place, city, state, and country of birth, sex on this page. The information entered must match the details mentioned in your passport.
    • In Personal 2, select the country of nationality i.e. India. There are two checkboxes to mention Yes or No. One is to understand you hold any other nationality other than India. The other is to understand whether you hold permanent residentship of any other country other than India. There is three other information for National Identification Number, US Social Security Number, and US Taxpayer Id Number. If you do not have any of these, click on the checkbox “Does not apply”.

Read: Self Introduction letter for Visa: All you need to know

2. Address and Phone – Enter your Home and mailing address and phone numbers.

    • In the Home address section, provide your street details, city, state, postal code, and country in India
    • If your home address and mailing address are different then enter the mailing address in India
    • Provide your personal as well as work phone numbers in case the consulate wants to connect with the applicant.

3. Passport – Enter all the correct details from your passport carefully

    • Select “Regular” from the Passport/Travel document type dropdown list. Provide your passport number against the field Passport/ Travel Document Number field. Click the checkbox “Does not apply” beside the field Passport Book Number
    • Select “India” from the Country/Authority that issued passport/travel document dropdown list
    • Provide the city and state from where the passport has been issued and mention the country as “India”
    • Mention the issuance and expiration dates of the passport
    • Select Yes or No for the question “Have you ever lost a passport or had one stolen?”

4. Travel – Enter details regarding your travel plans

    • Select “TEMP. BUSINESS PLEASURE VISITOR” from the dropdown list of Purpose of Trip to the U.S.
    • Select “BUSINESS & TOURISM (TEMPORARY VISITOR) (B1/B2)” from the dropdown list of Specify
    • Provide the intended date of arrival in the U.S., intended length of stay in the U.S. and address of stay in the U.S., if available
    • If you are paying for your trip then select “SELF” from the dropdown list of Person/Entity paying for your trip. If someone else is paying then you need to select “OTHER PERSON”.

5. Travel Companions – If anyone is travelling with you, then provide the surname, given name and relationship with the person in this section.

6. Previous U.S. Travel

    • If you ever been to the U.S. then you need to enter the details of the last five visits or less. Provide the date of arrival, length of stay and U.S. driver’s license number in case you have or remember
    • If you have ever before issued a U.S. Visa then you need to enter the details. Provide the issuance date of the visa and visa number
    • There are several checkboxes in this section which you need to answer certain questions regarding us visa documents

7. US Contact – You need to provide the details of the person you are visiting and the relationship with the person. In case you are travelling through a travel agent then ensure you have the relevant information from them. For situations where you are travelling on your own then you may enter the Hotel details or click on “Do Not Know”.

8. Family 

    • In this section, you need to enter the name, surname, and date of birth of your mother and father. You also need to mention whether your parents are in the U.S. or not
    • There are two more checkboxes for you to mention whether you have any other relatives in the U.S.
    • If you are married then you need to enter the details of your spouse too

9. Work/Education/Training 

    • If you are working, then you need to enter the details of your current employer as well as previous five or fewer employers, if any
    • If you are a student then you need to enter your education details. You can add all your educational qualifications in this section
    • There are some additional information you need to provide related to your international travel to countries other than the U.S. You need to enter the list of all the countries visited in the last five years
    • There are few more checkboxes to answer related to involvement in the military or any other groups

10. Security and Background – This section is divided into five parts. The applicant needs to answer several questions as Yes or No for the U.S. Consulate to collect the background information of the person.

Step 4: Upload your photo 

Click on the “Upload your photo” button to upload your photo mandatory for US tourist visa requirements

Step 5: Review the information provided in the DS-160 application form for US visa documents

You can check and rectify every section for the form for any errors and correct them as needed.

Step 6: Sign the form and submit the application for US tourist visa application from India 

You need to enter your passport number and the captcha code in this form. Electronically sign and submit the application.

Step 7: A confirmation page is displayed

The confirmation page provides options to print the confirmation, print the application or email the confirmation. It contains a bar code that is unique for each application. The confirmation page must be printed and submitted during the appointment. This ends the DS-160 application fill up activity.

How and where can I pay the American tourist visa fee?

The current non-petition based tourist visa fee for the USA from India is $160. The American tourist visa fee needs to be submitted online through either NEFT or payment via Bank. The steps to be followed for paying the fees for US visa documents are highlighted below:

  1. Click on the website
  2. Next, Click on Login from the menu
  3. Click on New User, if not registered
  4. The country will be selected as India. Enter your email id, First Name, Last Name, Password. 
  5. After the user id is created in the website, click on Schedule Appointment section
  6. The different payment options will be displayed on the payment confirmation section. The options available are NEFT, payments at AXIS Bank, Citibank or DRUK bank and payment through mobile phone
  7. After the payment, the receipt generation may take 1 or 2 business days. The appointment can be scheduled once the receipt is created in the system.

How to schedule an appointment for a US tourist visa application in India?

Applicants aged between 14 – 79 years need to appear for an interview at the US embassy or the consulate. Two appointments need to be selected for Tourist Visa for USA from India. One is an appointment at the Visa Application Center. The other is the visa interview at the US embassy in Delhi or the consulates at Chennai, Hyderabad, Kolkata or Mumbai.

While scheduling the appointment, you need to provide 

  • Your passport number
  • The receipt number generated after the payment and 
  • The bar code generated in the confirmation page

Appointment at the Visa Application Center

At the Visa Application Center, the photo and the fingerprints/biometric will be processed. The documents that are required for a US tourist visa are :

  • Passport (current and old)
  • The print out of the DS-160 application confirmation page
  • Photograph clicked as per the specifications of the US tourist visa requirements

Visa Interview at the US Embassy or Consulate

The applicant will undergo an interview at the Delhi embassy or any of the US consulates in India. The documents that are required for a US tourist visa are :

  • Passport (current and old)
  • The print out of the DS-160 confirmation page
  • The print out of the appointment confirmation page
  • Any other documents like salary proof, educational certificates, marriage certificates, bank statements, etc.

Ensure you are calm and answer all the questions related to your intended visit to the US. Carry all the necessary documents and double-check before leaving for the interview. Applicants need to attend the interview themselves without any person accompanying them.

You now are equipped with all the necessary information required for Tourist Visa for USA from India. Wish you all the best for your vacation in the US and a safe trip to the US.

Categories
France

France Visa From India: Explained

France gives every travel enthusiast a thousand reasons to go there or even return the second time. Whether to see the majestic Eiffel or admire Monet’s Waterlilies, a trip to France can never disappoint you. It was in the late 1900s that the Schengen agreement was signed in. Since then, one has to apply for a Schengen visa rather than a France visa from India. Applying for a Schengen visa, although not rocket science, but it still does require a layer of processes. 

Indians do have a wrong picture painted in their head that the application process of France tourist visa from India is complicated. It’s not. In this blog, we would look at the essentials of what documents are required, the legal processes and so on. Let’s take a look.

Applying for a visa for the first time? Read: How to apply for Visa? In focus – Schengen visa, H1B visa

Things to know about Schengen visa

In the whole of the European subcontinent, there are 26 member states that require you to carry a Schengen visa. These are the countries who had signed the Schengen agreement in the 1900’s. So, if you apply for a Schengen Visa France, then you can visit Germany, Switzerland or Spain with the same visa. At the same time, if you have an Austrian Schengen Visa, then you can use that to visit France. 

There are specific timelines when you want to visit the Schengen area. First if you are travelling there, you need to apply for a short-term Schengen Tourist Visa. There are two types – Type A and Type C. Depend a lot on the kind of visa you are applying for, the tourist visa gives you a single entry or multiple entry access.

For France Visa from India, you have to apply in the French embassy. The same applies to other countries as well. For Schengen Visa France, it is typically valid for six months and allows a tourist to stay in the country for three months. 90 days to be precise. Typically this is known as Schengen short-stay visa.

Know In DepthHow to get your Schengen visa from India?

How To Apply For France Visa From India?

There’s a France visa application form which you need to download and fill it accurately. Make sure to avoid overwriting, cancellations and anything messy. Handwriting should be crisp and clear. There is also an option for typing out the form. That way you can avoid unnecessary mistakes. But, in the place of a signature, handwrite or give a digitally handwritten signature. More authentic it looks. Then collect all the necessary documents required for your France visa from India and schedule an appointment to submit your application. And also your biometric data. You can submit it either 15 days before your planned dates of visit or even 3 months in advance. That way you would stay way ahead in case of any issues. If you are travelling alone, it would be easier but if it’s in a group, then each person has to submit their own form and schedule separate appointments.


Documents Required for your Visa Application

Keeping your France visa documents ready beforehand is the key for a smooth procedure. This should be done at the time you download and fill up the France visa application form. The documents required for France visa from India does depend a lot on the reason for travelling. 

If you are a tourist, then your documents should include:

  • Passport which is valid for at least three months. Expired or cancelled passports need to be carried as well.
  • A cover letter which explains your purpose of travel, a go through of your whole itinerary, and proof of your trip funding. You also need to provide a strong reason behind why you would be returning back to your country post the trip. For those reasons, many aspiring tourists carry documents and proof of their residence while going for the interview. You can also make a separate letter of intent for more proof. The officials would understand the seriousness of your purpose for travel. If your travel is sponsored, you need to mention and explain your relationship with the sponsor. In case, you are not able to provide any required document, do explain why are you not able to do so. Cover letter is the main communication channel for the embassy officials to know you better. If you want a hassle-free trip, keep your communication clear.

KnowCovering Letter For Visa – What it is and how you can make one 

  • Including your finance essentials is the next important document right after the cover letter. Attach your monthly pay slips for the last 3 months, bank statement of 6 months. Make sure that you have a constant bank activity in the last 6 months. These are mainly the reasons why you need to plan your travel well in advance. Also make sure to file an IT for the last three years and attach it along with the other financial documents. If someone else is funding your travel, then show the officials their documents. Ideally that person should be travelling with you. But, if it’s not the case, keep their salary pay slips, bank statements ready.
  • There are many a times when you do not have a properly planned itinerary. But, if you are travelling to France, make sure to write and sketch a proper travel plan. An accurately made itinerary has all the information about your to and fro flight timings, hotel bookings, internal transit details. If you are planning to stay over at a friend’s or relatives, a Proof of Accommodation is required. And that POA need s to be attested from the nearest Government office. Copies of their ID proof, passport, driving license are mandatory.

Also Read: Self Introduction Letter for Visa: All you need to know

  • If you are employed, then a NOC (No Objection Certificate) is a must from your employer. 
  • Adding a travel insurance for France visa from India is a must. You can very well ignore insurance requirements while travelling in India. But, for France, you need to carry one.
  • A confirmation of your travel insurance needs to be shown to the embassy during the interview.
  • Once all these documents for your France visa from India is ready, attach your various ID proofs. Aadhar, Pan Card, Ration card, Birth Ceritficate.

Once all these documents are ready, send them in a neatly done package to the visa office. Once your documents are processed, you would be called for a face-to-face interview. Make sure that your oral information tallies with the ones you have mentioned in all your documents.

Passport Photo Specifications

  • It should be a white, neutral background photo
  • Photo needs to be taken within six months of your visa appointment.
  • The applicant’s face should take up 70-80% of the frame and it should be 35-40mm wide.
  • No crease marks are entertained. The photograph print should be on high quality paper.
  • Applicant face should be clearly visible in the photograph. Hair pulled back, neutral expression and directly looking at the camera.
  • If you wear glasses, make sure to choose a light frame that does not cover your eyes. Tinted glasses are not allowed.
  • Headgear or anything which covers your head is not allowed. In case if it is mandatory or for religious reasons, make sure that it doesn’t cover your forehead, face or create any shadows.
  • For children’s passport photo, no one else should be visible in the frame.

France visa cost from India

If you are a regular tourist, then the French Schengen visa would cost you INR 4348. A service charge of INR 1446 which is additional also needs to be paid. The visa fee has been reduced to INR 2536 for the kids. Service charge remains same though for all. Fees are non-refundable and only accepted by cash, debit or credit while payment. Once your visa is issued, you can collect your passport. A courier fee of INR 300each needs to paid for every passport (in case if you are traveling in a group).

Further Read: 10 Amazing Countries That Offer Visa On Arrival For Indians